
After installing ubuntu 18:
https://softdiscover.com/2018/05/24/installing-nginx…php-in-ubuntu-18/
we are going to install the next service for our powerful web server
INSTALLING POSTFIX
update first:
apt-get update
apt -y install postfix sasl2-bin
then choose internet-site option
then on system mail name, I added mail.mydomain.com
For making test, install this:
sudo apt-get install mailutils
then we will make a test
echo "Test Email message body" | mail -s "Email test subject" info@yourothermail.com
INSTALLING MARIADB
just install using the commands:
sudo apt install mariadb-server mariadb-client
check mysql version
mysql -V
After installing the server above, run the commands below to set a root password, remove the test database and disable the root from logging on remotely.
sudo mysql_secure_installation
When prompted, answer the questions below by following the guide.
- Enter current password for root (enter for none): Just press the Enter
- Set root password? [Y/n]: Y
- New password: Enter password
- Re-enter new password: Repeat password
- Remove anonymous users? [Y/n]: Y
- Disallow root login remotely? [Y/n]: Y
- Remove test database and access to it? [Y/n]: Y
- Reload privilege tables now? [Y/n]: Y
Restart MariaDB server
sudo systemctl restart mariadb.service
then we will create a new mysql user, so we will log into mysql
mysql -uroot mysql
once logged, put the next code
CREATE USER 'admin'@'localhost' IDENTIFIED BY 'yourpassword';
GRANT ALL PRIVILEGES ON *.* TO 'admin'@'localhost';
FLUSH PRIVILEGES;
then you can connect from any mysql client to your server
Installing MariaDB on Ubuntu 18.04 from the MariaDB Repositories
At the time of writing this article, the latest version of MariaDB available from the official MariaDB repositories is MariaDB version 10.3. Before continuing with the next step you should visit the MariaDB Repository page and check if there is a new version available.
To install MariaDB 10.3 on your Ubuntu 18.04 server perform the following steps:
First add the MariaDB GPG key to your system using the following command:
sudo apt-key adv --recv-keys --keyserver hkp://keyserver.ubuntu.com:80 0xF1656F24C74CD1D8
Once the key is imported, add the MariaDB repository with:
sudo add-apt-repository 'deb [arch=amd64,arm64,ppc64el] http://ftp.utexas.edu/mariadb/repo/10.3/ubuntu bionic main'
If you get an error message saying add-apt-repository command not found install the software-properties-common package.
To be able to install packages from the MariaDB repository you’ll need to update the packages list:
sudo apt update
Now that the repository is added install the MariaDB package with:
sudo apt install mariadb-server
The MariaDB service will start automatically, to verify it type:
sudo systemctl status mariadb
● mariadb.service – MariaDB 10.3.8 database server
Loaded: loaded (/lib/systemd/system/mariadb.service; enabled; vendor preset: enabled)
Drop-In: /etc/systemd/system/mariadb.service.d
└─migrated-from-my.cnf-settings.conf
Active: active (running) since Sun 2018-07-29 19:36:30 UTC; 56s ago
Docs: man:mysqld(8)
https://mariadb.com/kb/en/library/systemd/
Main PID: 16417 (mysqld)
Status: “Taking your SQL requests now…”
Tasks: 31 (limit: 507)
CGroup: /system.slice/mariadb.service
└─16417 /usr/sbin/mysqld
And print the MariaDB server version, with:
mysql -V
mysql Ver 15.1 Distrib 10.3.8-MariaDB, for debian-linux-gnu (x86_64) using readline 5.2
Securing MariaDB
Run the mysql_secure_installation command to improve the security of the MariaDB installation:
sudo mysql_secure_installation
The script will prompt you to set up the root user password, remove the anonymous user, restrict root user access to the local machine and remove the test database. At the end the script will reload the privilege tables ensuring that all changes take effect immediately.
All steps are explained in detail and it is recommended to answer “Y” (yes) to all questions.
For removing mariadb:
There are a few other options which might be of use:
sudo apt-get remove mariadb-server
This will remove just the mariadb-server package itself.
sudo apt-get remove --auto-remove mariadb-server
This will remove the mariadb-server package and any other dependant packages which are no longer needed.
If you also want to delete your local/config files for mariadb-server then this will work.
sudo apt-get purge --auto-remove mariadb-server
but be careful with that last one.
ref:https://www.ostechnix.com/install-nginx-mariadb-php-lemp-stack-ubuntu-16-04-lts/
INSTALLING NGINX
installing nginx
sudo apt install nginx
ALLOW HTTP TRAFFIC
sudo ufw allow 'Nginx Full'
sudo ufw status
Next, test to make sure that there are no syntax errors in any of your Nginx files:
sudo nginx -t
If no problems were found, restart Nginx to enable your changes:
sudo systemctl restart nginx
Nginx should now be serving both of your domain names.
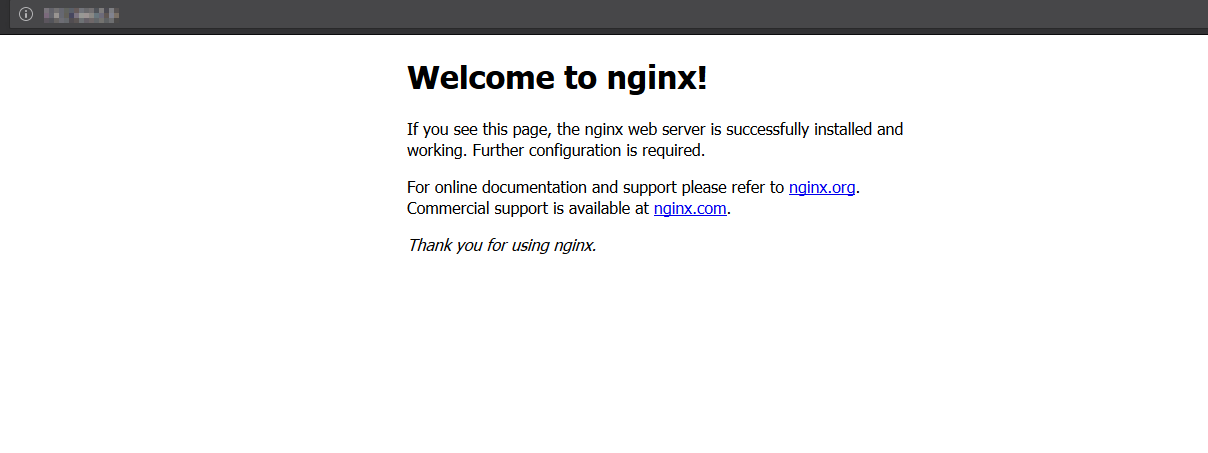
then you can check if it is working fine. just open a browser and put the ip of your server. it would look like this:
You can check the status of UFW by running the following command in a SSH shell:
sudo ufw status
If UFW is not currently configured or running, you should see a message indicating that UFW is inactive:
Status: inactive
If UFW is inactive, you can activate it by running the following commands:
sudo ufw disable
sudo ufw enable
After disabling and enabling UFW, it should now be in an active status.
How to fix the NGINX error “Failed to read PID from file”, quick and easy
Here’s a tip on how to fix the error message:
nginx.service: Failed to read PID from file /run/nginx.pid: Invalid argument
quick and easy. This fix should do it for you.
This behavior is a known bug, caused by a race condition between nginx and systemd. Systemd is expecting the PID file to be populated before nginx had the time to create it.
To fix the error, you have basically two options.
Option 1: create the PID file
To fix the error, you have to create the PID file manually.
Step 1. Create the directory /etc/systemd/system/nginx.service.d
Create a directory named nginx.service.d in /etc/systemd/system/:
mkdir /etc/systemd/system/nginx.service.d
Should the system complain that it already exists, ignore and move on to Step 2.
Step 2. Print data to file
Execute:
printf "[Service]\nExecStartPost=/bin/sleep 0.1\n" > /etc/systemd/system/nginx.service.d/override.conf
This is a one-liner. printf will write its output into the configuration file /etc/systemd/
Step 3. Reload the daemon
Reload systemd manager configuration:
systemctl daemon-reload
This will rerun all generators, reload all unit files and recreate the entire systemd dependency tree.
Step 4. Restart NGINX
This line will restart NGINX for you:
systemctl restart nginx
The error should be fixed now.
Option 2: an alternative workaround
Another workaround is removing the PIDFile option and adding the line:
ExecStopPost=/bin/rm -f /run/nginx.pid
You can find the full documentation of this bug at:
https://bugs.launchpad.net/ubuntu/+source/nginx/+bug/1581864
If you experience this problem, SELinux could be preventing php-fpm from accessing a port. Just a hint. Try
journalctl -xe
for guidance on your next steps.
INSTALLING PHP
Installing php:
sudo apt-get install php-fpm php-cgi php-common php-pear php-mbstring
In case, it doesnt work. update repository with this:
apt install software-properties-common
add-apt-repository ppa:ondrej/php
apt update
apt install php7.2-fpm php7.2-cli php7.2-curl php7.2-mysql php7.2-dev php7.2-cli php7.2-common php7.2-mbstring php7.2-intl php7.2-zip php7.2-bcmath
then check php version:
php -v
sample output:
 PHP 7.2.5-0ubuntu0.18.04.1 (cli) (built: May 9 2018 17:21:02) ( NTS )
 Copyright (c) 1997-2018 The PHP Group
 Zend Engine v3.2.0, Copyright (c) 1998-2018 Zend Technologies
 with Zend OPcache v7.2.5-0ubuntu0.18.04.1, Copyright (c) 1999-2018, by Zend Technologies
then find php.ini file
php --ini |grep Loaded
to integrate with nginx follow this. Edit the file using your favorite text editor:
sudo nano /etc/php/7.2/cli/php.ini
Make the following changes:
cgi.fix_pathinfo=0
Then, restart the PHP-FPM service:
sudo systemctl restart php7.2-fpm.service
then we will install serveral php modules.
In order to install extra PHP7.0 modules use:
apt search php7.2
mbstring module
sudo apt install php7.2-mbstring
GD module
sudo apt install php7.2-gd
curl module
sudo apt install php7.2-curl
others
sudo apt install php7.2-intl
sudo apt install php7.2-soap
sudo apt install php7.2-zip

sudo apt install php7.2-xml
restart to take effect those changes
sudo systemctl restart php7.2-fpm.service
For connecting mysql to php
sudo apt-get install php-mysql
sudo apt install php7.2-mysql
restart to take effect
sudo systemctl restart php7.2-fpm.service
INSTALLING VARNISH
Let’s start by install Varnish.
sudo apt -y install varnish nginx
check varnish version:
varnishd -V
check varnish status
systemctl restart varnish
By default, varnish will be using port 6081 for public access, and port 6082 for the varnish admin web interface. Check it using the netstat command, and make sure those ports are on the list.
netstat -plntu | grep 'varnish'
Since we want to route traffic from Nginx via Varnish cache server the aim now is to reconfigure Varnish cache server to listen on port 80 thus act as a front to all public HTTP requests. To do so edit its systemd configuration file /lib/systemd/system/varnish.service:
sudo nano /lib/systemd/system/varnish.service
Edit Line 9 and change default port 6081 to port 80 as shown bellow:
[Unit]
Description=Varnish HTTP accelerator
Documentation=https://www.varnish-cache.org/docs/4.1/ man:varnishd

[Service]
Type=simple
LimitNOFILE=131072
LimitMEMLOCK=82000
ExecStart=/usr/sbin/varnishd -j unix,user=vcache -F -a :80 -T localhost:6082 -f /etc/varnish/default.vcl -S /etc/varnish/secret -s malloc,256m
ExecReload=/usr/share/varnish/varnishreload
ProtectSystem=full
ProtectHome=true
PrivateTmp=true
PrivateDevices=true

[Install]
WantedBy=multi-user.target
Next, we need to instruct Varnish to rely on Nginx port 8080. Edit /etc/varnish/default.vcl
sudo nano /etc/varnish/default.vcl
In case your Nginx server resides on the same host as Varnish server leave the Line 3 without any change, otherwise enter your Nginx IP address. The port number of our Nginx server is 8080, if you have different configuration edit Line 4 appropriately:
# Default backend definition. Set this to point to your content server.
backend default {
    .host = "127.0.0.1";
    .port = "8080";
}
Almost ready! All what remains is to reload systemd daemon and restart the Varnish cache server:
sudo systemctl daemon-reload
sudo service varnish restart
CREATE SELF SSL
TLS/SSL works by using a combination of a public certificate and a private key. The SSL key is kept secret on the server. It is used to encrypt content sent to clients. The SSL certificate is publicly shared with anyone requesting the content. It can be used to decrypt the content signed by the associated SSL key.
Install the git package:
sudo apt-get install gitDownload a clone of Let’s Encrypt from the official GitHub repository. /opt is a common installation directory for third-party packages, so let’s install the clone to /opt/letsencrypt:
sudo git clone https://github.com/letsencrypt/letsencrypt /opt/letsencryptbefore creating your ssl for you domain. make sure the dns is updated worldwide. you can check your domain using this site:
https://dnschecker.org/
then stop just for a while the nginx and varanish in order to leave free port 80 or 8080 because let’s encrypt need those ports
service nginx stop
service varnish stop
then generate the ssl for your domain
Navigate to the new /opt/letsencrypt directory:
cd /opt/letsencryptthen generate ssl for your domain
sudo -H ./letsencrypt-auto certonly --standalone -d example.com -d www.example.com
and letsencrypt check and verify your domain in your host. you will see a message like this:
Saving debug log to /var/log/letsencrypt/letsencrypt.log
Plugins selected: Authenticator standalone, Installer None
Obtaining a new certificate
Performing the following challenges:
http-01 challenge for example.com
Waiting for verification...
Cleaning up challenges

IMPORTANT NOTES:
 - Congratulations! Your certificate and chain have been saved at:
   /etc/letsencrypt/live/example.com/fullchain.pem
   Your key file has been saved at:
   /etc/letsencrypt/live/example.com/privkey.pem
   Your cert will expire on 2018-08-24. To obtain a new or tweaked
   version of this certificate in the future, simply run
   letsencrypt-auto again. To non-interactively renew *all* of your
   certificates, run "letsencrypt-auto renew"
 - If you like Certbot, please consider supporting our work by:

   Donating to ISRG / Let's Encrypt:   https://letsencrypt.org/donate
   Donating to EFF:                    https://eff.org/donate-le
then activate again nginx and varnish
service nginx restart
service varnish restart
Note
Let’s Encrypt certificates have a 90-day lifespan. According to Let’s Encrypt, this encourages automation and minimizes damage from key compromises. You can renew your certificates at any time during their lifespan.
Automatically Renew SSL Certificates (Optional)
You can also automate certificate renewal. This will prevent your certificates from expiring, and can be accomplished with cron.
1. The output of the previous command shows how to non-interactively renew all of your certificates:
./letsencrypt-auto renew
2. Set this task to run automatically once per month using a cron job:
sudo crontab -e
Add the following line to the end of the crontab file:
0 0 1 * * /opt/letsencrypt/letsencrypt-auto renew
Update Let’s Encrypt
Return to the /opt/letsencrypt directory:
cd /opt/letsencrypt
Download any changes made to Let’s Encrypt since you last cloned or pulled the repository, effectively updating it:
sudo git pull
Automatically Update Let’s Encrypt (Optional)
You can also use cron to keep the letsencrypt-auto client up to date.
sudo crontab -e
0 0 1 * * cd /opt/letsencrypt && git pull
How to remove ssl from letsencrypt
sudo rm -rf /etc/letsencrypt/{live,renewal,archive}/{${DOMAIN},${DOMAIN}.conf}
sudo rm -rf /etc/letsencrypt/{live,renewal,archive}/{youdomain.com,yourdomain.conf}
INSTALLING MEMCACHED
update first:
apt-get -y update
installing memcached
sudo apt-get install memcached php-memcache php-memcached
install PHP with Nginx and Memcached modules.
sudo apt-get install php-fpm php-memcached php-cli
- Change the memcached configuration setting for CACHESIZE and -l:
- Open /etc/memcached.conf in a text editor.
- Locate the -m parameter.
- Change its value to at least 1GB
- Locate the -l parameter.
- Change its value to 127.0.0.1 or localhost
- Save your changes to memcached.conf and exit the text editor.
- Restart memcached.
- service memcached restart
If the test is successful, restart memcached, php7.2-fpm and Nginx services for the changes to take effect:
sudo service memcached restart
sudo service php7.2-fpm restart
sudo service nginx restart
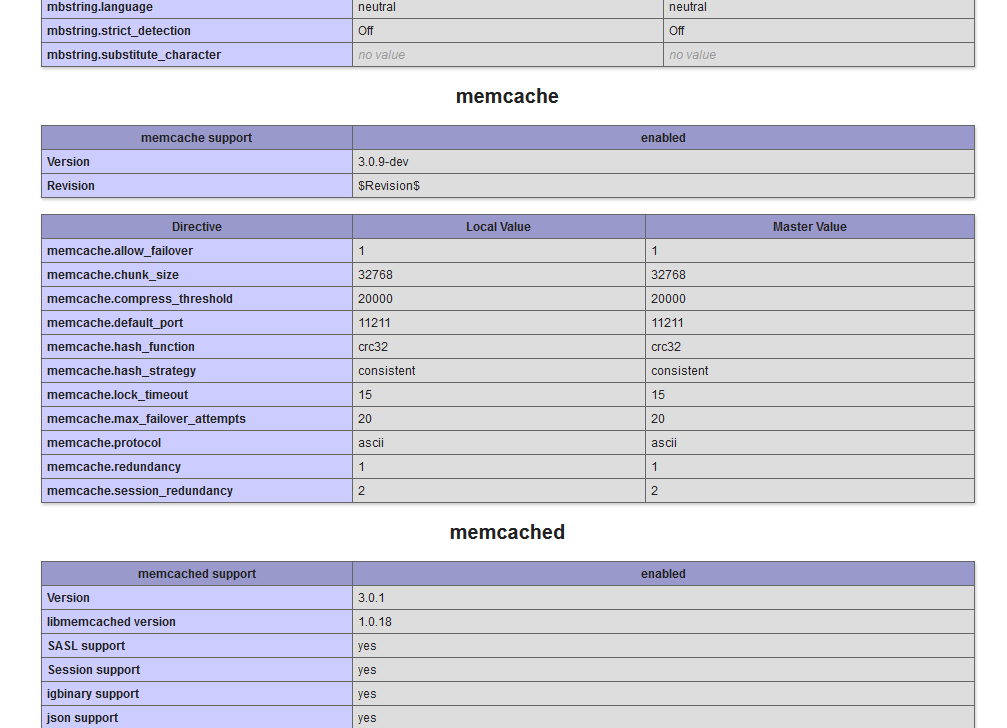
you can check the status with next:
service memcached status
and checking php info, you can see memcached is installed successfully
INSTALLING WORDPRESS
once installed nginx, mysql and php. you can install wordpress.
I assume the nameservers of your domain (example.com) is pointing to your server.
so we create a new block on nginx:
nano /etc/nginx/sites-available/example.com
and I added the next content which is according to my domain and path folder, so you would need to customize this code according to your domain. just replace “example.com” with your domain and “/www/public” path with your own path folder.
##################################
# this block belong to your domain example.com
####################################
server {
        root /www/public;
        index index.php index.html index.htm;
        server_name example.com;

		listen 443 ssl http2;
        listen [::]:443 ssl http2;

		ssl_certificate /etc/letsencrypt/live/example.com/fullchain.pem;
		ssl_certificate_key /etc/letsencrypt/live/example.com/privkey.pem;

		#add_header Strict-Transport-Security "max-age=31536000";
		#add_header X-Content-Type-Options nosniff;

		access_log /www/public/example-access-ssl.log;
		error_log /www/public/example-error-ssl.log;

        error_page 404 /custom_404.html;
		location = /custom_404.html {
                root /usr/share/nginx/html;
                internal;
        }

        error_page 500 502 503 504 /50x.html;
        location = /50x.html {
                root /usr/share/nginx/html;
        }

		location / {
			proxy_pass http://127.0.0.1:80;
            proxy_set_header X-Real-IP  $remote_addr;
            proxy_set_header X-Forwarded-For $proxy_add_x_forwarded_for;
            proxy_set_header X-Forwarded-Proto https;
            proxy_set_header X-Forwarded-Port 443;
            proxy_set_header Host $host;

        }

		location ~ \.php$ {
			include snippets/fastcgi-php.conf;
			fastcgi_pass unix:/var/run/php/php7.2-fpm.sock;
			fastcgi_param SCRIPT_FILENAME $document_root$fastcgi_script_name;
			include fastcgi_params;
		}

		# STATICS FILES
		location ~* \.(js|css|png|jpg|jpeg|gif|ico)$ {
			expires max;
			log_not_found off;
		}
}

server {
        root /www/public;
        index index.php index.html index.htm;
        server_name example.com;

		listen 8080;
        listen [::]:8080;


		access_log /www/public/uiform-access.log;
		error_log /www/public/uiform-error.log;


        error_page 404 /custom_404.html;
		location = /custom_404.html {
                root /usr/share/nginx/html;
                internal;
        }

        error_page 500 502 503 504 /50x.html;
        location = /50x.html {
                root /usr/share/nginx/html;
        }

		location / {

			# try_files $uri $uri/ =404;
                try_files $uri $uri/ /index.php?q=$uri&$args;
			#try_files $uri $uri/ /index.php?$args;
        }

		location ~ \.php$ {
			include snippets/fastcgi-php.conf;
			fastcgi_pass unix:/var/run/php/php7.2-fpm.sock;
			fastcgi_param SCRIPT_FILENAME $document_root$fastcgi_script_name;
			include fastcgi_params;
		}

		# STATICS FILES
		location ~* \.(js|css|png|jpg|jpeg|gif|ico)$ {
			expires max;
			log_not_found off;
		}
}
and check if the syntax is correct using the next command:
nginx -t
when the syntax is fine, you can create the symlink:
sudo ln -s /etc/nginx/sites-available/example.com /etc/nginx/sites-enabled/example.com
then restart nginx:
service nginx restart
also varnish, if it was inactive
service varnish restart
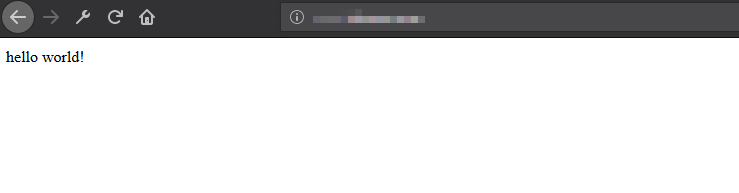
then you can test a simple index.html on your host. here how it would look using http:
and here how it would look using https:
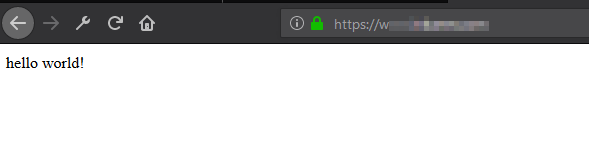
you can see with https, a green padlock appear.
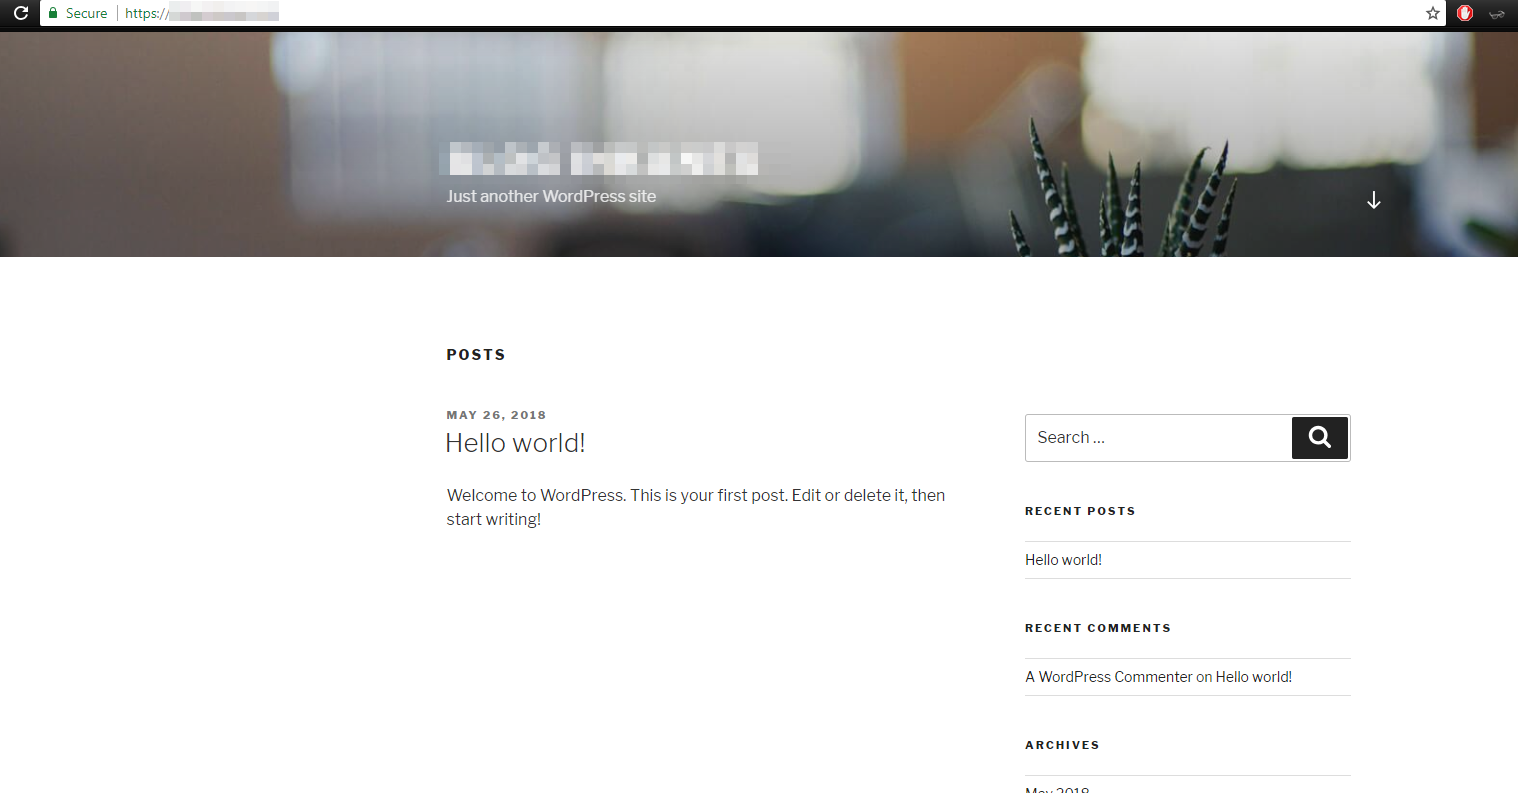
now we are ready to install wordpress. first download wordpress:
then upload to your host and install it. and you would have something like this:
For https, you need to add the next code in config.php from wordpress directory, add it before database settings line:
if ( $_SERVER['HTTP_X_FORWARDED_PROTO'] == 'https' )
{
        $_SERVER['HTTPS']       = 'on';
        $_SERVER['SERVER_PORT'] = '443';
        define('FORCE_SSL_ADMIN', true);
}

if ( isset($_SERVER['HTTP_X_FORWARDED_HOST'])) {
        $_SERVER['HTTP_HOST'] = $_SERVER['HTTP_X_FORWARDED_HOST'];
}
In order to make varnish work well with wordpress, configure varnish as next:
sudo nano /etc/varnish/default.vcl
#
# This is an example VCL file for Varnish.
#
# It does not do anything by default, delegating control to the
# builtin VCL. The builtin VCL is called when there is no explicit
# return statement.
#
# See the VCL chapters in the Users Guide at https://www.varnish-cache.org/docs/
# and http://varnish-cache.org/trac/wiki/VCLExamples for more examples.

# Update for work with Varnish 4


# Marker to tell the VCL compiler that this VCL has been adapted to the
# new 4.0 format.
vcl 4.0;

# Default backend definition. Set this to point to your content server.
backend default {
    .host = "127.0.0.1";
    .port = "8080";
    .connect_timeout = 600s;
    .first_byte_timeout = 600s;
    .between_bytes_timeout = 600s;
    .max_connections = 800;
}

# Only allow purging from specific IPs
acl purge {
    "localhost";
    "127.0.0.1";
}

# This function is used when a request is send by a HTTP client (Browser)
sub vcl_recv {
	# Normalize the header, remove the port (in case you're testing this on various TCP ports)
	set req.http.Host = regsub(req.http.Host, ":[0-9]+", "");


	# Allow purging from ACL
	if (req.method == "PURGE") {
		# If not allowed then a error 405 is returned
		if (!client.ip ~ purge) {
			return(synth(405, "This IP is not allowed to send PURGE requests."));
		}
		# If allowed, do a cache_lookup -> vlc_hit() or vlc_miss()
		return (purge);
	}

	# Post requests will not be cached
	if (req.http.Authorization || req.method == "POST") {
		return (pass);
	}

	# --- WordPress specific configuration

	# Did not cache the RSS feed
	if (req.url ~ "/feed") {
		return (pass);
	}

	# Blitz hack
        if (req.url ~ "/mu-.*") {
                return (pass);
        }


	# Did not cache the admin and login pages
	if (req.url ~ "/wp-(login|admin)")  {
		return (pass);
	}

	 # Do not cache the WooCommerce pages
	 ### REMOVE IT IF YOU DO NOT USE WOOCOMMERCE ###
	if (req.url ~ "/(cart|my-account|checkout|addons|/?add-to-cart=)") {
        	return (pass);
    	}

	# Remove the "has_js" cookie
	set req.http.Cookie = regsuball(req.http.Cookie, "has_js=[^;]+(; )?", "");

	# Remove any Google Analytics based cookies
	set req.http.Cookie = regsuball(req.http.Cookie, "__utm.=[^;]+(; )?", "");

	# Remove the Quant Capital cookies (added by some plugin, all __qca)
	set req.http.Cookie = regsuball(req.http.Cookie, "__qc.=[^;]+(; )?", "");

	# Remove the wp-settings-1 cookie
	set req.http.Cookie = regsuball(req.http.Cookie, "wp-settings-1=[^;]+(; )?", "");

	# Remove the wp-settings-time-1 cookie
	set req.http.Cookie = regsuball(req.http.Cookie, "wp-settings-time-1=[^;]+(; )?", "");

	# Remove the wp test cookie
	set req.http.Cookie = regsuball(req.http.Cookie, "wordpress_test_cookie=[^;]+(; )?", "");

	# Are there cookies left with only spaces or that are empty?
	if (req.http.cookie ~ "^ *$") {
		    unset req.http.cookie;
	}

	# Cache the following files extensions
	if (req.url ~ "\.(css|js|png|gif|jp(e)?g|swf|ico)") {
		unset req.http.cookie;
	}

	# Normalize Accept-Encoding header and compression
	# https://www.varnish-cache.org/docs/3.0/tutorial/vary.html
	if (req.http.Accept-Encoding) {
		# Do no compress compressed files...
		if (req.url ~ "\.(jpg|png|gif|gz|tgz|bz2|tbz|mp3|ogg)$") {
			   	unset req.http.Accept-Encoding;
		} elsif (req.http.Accept-Encoding ~ "gzip") {
		    	set req.http.Accept-Encoding = "gzip";
		} elsif (req.http.Accept-Encoding ~ "deflate") {
		    	set req.http.Accept-Encoding = "deflate";
		} else {
			unset req.http.Accept-Encoding;
		}
	}

	# Check the cookies for wordpress-specific items
	if (req.http.Cookie ~ "wordpress_" || req.http.Cookie ~ "comment_") {
		return (pass);
	}
	if (!req.http.cookie) {
		unset req.http.cookie;
	}

	# --- End of WordPress specific configuration

	# Did not cache HTTP authentication and HTTP Cookie
	if (req.http.Authorization || req.http.Cookie) {
		# Not cacheable by default
		return (pass);
	}

	# Cache all others requests
	return (hash);
}

sub vcl_pipe {
	return (pipe);
}

sub vcl_pass {
	return (fetch);
}

# The data on which the hashing will take place
sub vcl_hash {
 	hash_data(req.url);
 	if (req.http.host) {
     	hash_data(req.http.host);
 	} else {
     	hash_data(server.ip);
 	}

	# If the client supports compression, keep that in a different cache
    	if (req.http.Accept-Encoding) {
        	hash_data(req.http.Accept-Encoding);
	}

	return (lookup);
}

# This function is used when a request is sent by our backend (Nginx server)
sub vcl_backend_response {

	# Remove some headers we never want to see
	unset beresp.http.Server;
	unset beresp.http.X-Powered-By;

	# For static content strip all backend cookies
	if (bereq.url ~ "\.(css|js|png|gif|jp(e?)g)|swf|ico") {
		unset beresp.http.cookie;
	}

	# Only allow cookies to be set if we're in admin area
	if (beresp.http.Set-Cookie && bereq.url !~ "^/wp-(login|admin)") {
        	unset beresp.http.Set-Cookie;
    	}

	# don't cache response to posted requests or those with basic auth
	if ( bereq.method == "POST" || bereq.http.Authorization ) {
        	set beresp.uncacheable = true;
		set beresp.ttl = 120s;
		return (deliver);
    	}

    	# don't cache search results
	if ( bereq.url ~ "\?s=" ){
		set beresp.uncacheable = true;
                set beresp.ttl = 120s;
                return (deliver);
	}

	# only cache status ok
	if ( beresp.status != 200 ) {
		set beresp.uncacheable = true;
                set beresp.ttl = 120s;
                return (deliver);
	}

	# A TTL of 24h
	set beresp.ttl = 24h;
	# Define the default grace period to serve cached content
	set beresp.grace = 30s;

	return (deliver);
}

# The routine when we deliver the HTTP request to the user
# Last chance to modify headers that are sent to the client
sub vcl_deliver {
	if (obj.hits > 0) {
		set resp.http.X-Cache = "cached";
	} else {
		set resp.http.x-Cache = "uncached";
	}

	# Remove some headers: PHP version
	unset resp.http.X-Powered-By;

	# Remove some headers: Apache version & OS
	unset resp.http.Server;

	# Remove some heanders: Varnish
	unset resp.http.Via;
	unset resp.http.X-Varnish;

	return (deliver);
}

sub vcl_init {
 	return (ok);
}

sub vcl_fini {
 	return (ok);
}
it will allow to not make cache on backend of the wordpress.
then we are going to config nginx setting:
nano /etc/nginx/nginx.conf
and the next content:
user www-data;
worker_processes auto;
pid /run/nginx.pid;
include /etc/nginx/modules-enabled/*.conf;

events {
	worker_connections 768;
	# multi_accept on;
}

http {

	##
	# Basic Settings
	##

	sendfile on;
	tcp_nopush on;
	tcp_nodelay on;
	keepalive_timeout 65;
	types_hash_max_size 2048;
	# server_tokens off;

	# server_names_hash_bucket_size 64;
	# server_name_in_redirect off;

	include /etc/nginx/mime.types;
	default_type application/octet-stream;

	##
	# SSL Settings
	##

	ssl_protocols TLSv1 TLSv1.1 TLSv1.2; # Dropping SSLv3, ref: POODLE
	ssl_prefer_server_ciphers on;

	##
	# Logging Settings
	##

	access_log /var/log/nginx/access.log;
	error_log /var/log/nginx/error.log;

	# Log format
	set_real_ip_from 	127.0.0.1;
	real_ip_header 		X-Forwarded-For;
	log_format 	main '$remote_addr - $remote_user [$time_local]  $status '
		'"$request" $body_bytes_sent "$http_referer" '
    		'"$http_user_agent" "$http_x_forwarded_for"';

	# Hide the Nginx version number
	server_tokens off;

	# Timeouts

	client_body_timeout   		30;
	client_header_timeout 		30;
	send_timeout          		30;
	client_max_body_size		20M;
	reset_timedout_connection 	on;


	##
	# Gzip Settings
	##

	# Gzip module configuration
	gzip  			on;
	gzip_disable 		"MSIE [1-6].(?!.*SV1)";
	gzip_vary 		on;
	gzip_comp_level 	3;
	gzip_proxied 		any;
	gzip_buffers 		16 8k;

	# gzip_vary on;
	# gzip_proxied any;
	# gzip_comp_level 6;
	# gzip_buffers 16 8k;
	# gzip_http_version 1.1;
	# gzip_types text/plain text/css application/json application/javascript text/xml application/xml application/xml+rss text/javascript;


	##
	# Virtual Host Configs
	##

	include /etc/nginx/conf.d/*.conf;
	include /etc/nginx/sites-enabled/*;
}


#mail {
#	# See sample authentication script at:
#	# http://wiki.nginx.org/ImapAuthenticateWithApachePhpScript
#
#	# auth_http localhost/auth.php;
#	# pop3_capabilities "TOP" "USER";
#	# imap_capabilities "IMAP4rev1" "UIDPLUS";
#
#	server {
#		listen     localhost:110;
#		protocol   pop3;
#		proxy      on;
#	}
#
#	server {
#		listen     localhost:143;
#		protocol   imap;
#		proxy      on;
#	}
#}
then finally. save changes and restart nginx:
service nginx restart
and that’s all. you have your wordpress site working on your server with nginx, mysql, php, varnish, ssl, and memcached.


